The Mt. Washington Valley Economic Council
FALL 2018
QuickBooks® Desktop Boot Camps
with Rhonda Rosand, CPA – Advanced Certified QuickBooks® ProAdvisor
Session #1 QuickBooks® Set Up – Do It Right the First Time
Tuesday, October 2nd, 2018, 9 AM -11 AM
Whether you are starting from scratch or starting over, there is a right way and several wrong ways to set up a QuickBooks® file. Learn how to do it right the first time.
Avoid some of the common mistakes we see people make.
QuickBooks® Solutions
Accounts and Items
Users and Permissions
Customers/Jobs/Vendors
Class Tracking
Common Pitfalls
Session #2 Customizing Forms and Templates and QuickBooks® Reports
Tuesday, October 16th, 2018, 9 AM – 11 AM
Learn how to customize forms and templates and create QuickBooks® reports that are useful management tools for your business. Understand the difference between profits and cash.
Customize Forms and Templates
QuickBooks Reports
Revenue Planning
Cash Flow Management
Tuesday, October 23rd, 2018, 9 AM-NOON
This is a session designed exclusively for tax preparers, enrolled agents and accountants. We will cover advanced level topics to help you streamline the process and best practices for troubleshooting your client QuickBooks® file during this busy tax season.
What’s New in QuickBooks® 2019
In Product Demonstration of Features
Client Data Review and Accountant Toolbox
Common Issues and Troubleshooting
Hosting Platforms
3rd Applications
Courses are $35 each and held in the Community Room at Granite State College-Conway.
To register please call Susie at (603) 447-6622, email susie@mwvec.com, or register online.
Learn How To Add & Edit Multiple List Entries in QuickBooks with Rhonda Rosand CPA and Advanced Certified QuickBooks ProAdvisor!
Learn How To Write Off A Bad Debt In QuickBooks with Rhonda Rosand, CPA, Advanced Certified QuickBooks Proadvisor of New Business Directions, LLC.
Chart of Accounts in QuickBooks Why the Chart of Accounts in QuickBooks is the Most Important List!
How to Back Up Your QuickBooks File Learn how to back up your QuickBooks file with Rhonda Rosand, CPA of New Business Directions, LLC.
How to Use the Same Name on Different Lists in QuickBooks Learn How to Use the Same Name on Different Lists in QuickBooks with Rhonda Rosand, CPA of New Business Directions, LLC.
How to Back Up Your QuickBooks File Learn how to back up your QuickBooks file with Rhonda Rosand, CPA of New Business Directions, LLC.
Learn How to Navigate the Homepage of QuickBooks with Rhonda Rosand of New Business Directions, LLC.
Working with Checks in QuickBooks
Online banking may get all the headlines, but many small businesses still insist on paper checks. QuickBooks can accommodate them.
“I don’t write checks anymore,” you hear a lot of people say these days. Debit cards, smartphone payment apps, and online banking have replaced the old paper checkbook for a lot of consumers.
That’s fine if you’re at Starbucks or the grocery store, but many small businesses still prefer to issue paper checks to pay bills, cover expenses, and make product and service purchases. QuickBooks provides tools that help you create, print, and track checks.
But you don’t just head to the Write Checks window every time something needs to be paid. There are numerous times when you would record a payment in a different area of the program. For example, if you’ve already created a bill in Enter Bills, you’d go to the Pay Bills screen to dispatch a check.
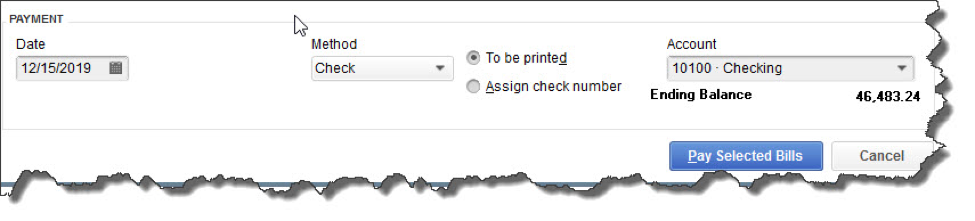
Once you’ve recorded a bill in Enter Bills, you need to visit the Pay Bills screen to dispatch a check. The image above shows the bottom of that screen.
Other examples here include:
- Issuing paychecks (click the Pay Employees icon),
- Submitting payroll taxes and liabilities (Pay Liabilities icon), and
- Paying sales taxes (Manage sales tax icon).
Simple Steps
Let’s say you asked an employee to go to an office supply store to pick up some copy paper because you ran short before your normal shipment came in. If you knew the exact amount it would cost, you could write a check directly to the shop. But the employee agrees to pay for it and be reimbursed.
Click the Write Checks icon on the home page. If the BANK ACCOUNT that’s showing isn’t the correct one, click the arrow to the right of that field and select the right one. Unless you’ve written a check to that employee before, he won’t be in the Vendor list that opens when you click the arrow to the right of PAY TO THE ORDER OF. Enter his name in that field.
The Name Not Found window opens. If this was a new vendor that you would be working with again, you’d click Set Up and follow the instructions in the step-by-step wizard that opened. Since this isn’t the case, click Quick Add. In the window that opens, click the button next to Vendor.
Note: If you’re using a payroll application, you already have an employee record for that individual, which would have filled in automatically when you started typing the name. Since this is a Non-Payroll Transaction, it won’t get mixed up with his payroll records as long as you assign the correct account.
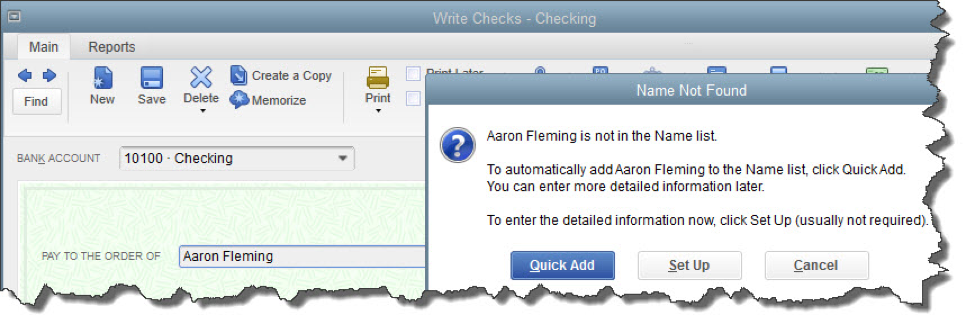
If you don’t want to create an entire record for the payee of a check, you can just click Quick Add.
QuickBooks will then return you to the check-writing screen, where you can verify the check number and date, and enter the amount. Fill in the MEMO field so you’ll remember the reason for the payment.
At the bottom of the screen, you’ll see a tabbed register. The Expenses tab should be highlighted and the amount of your check entered. Click the down arrow in the field under ACCOUNT to open the list, and select Office Supplies. The AMOUNT should fill in automatically. Not sure which account to select, and what the remaining three columns mean? Ask us.
Note: You would only enter the expense under the Items tab if you were buying inventory items or paying job-related costs.
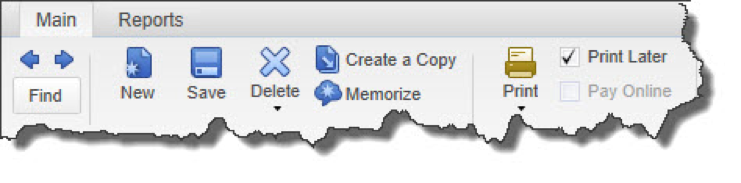
Warning: If you’re planning to print the check, be sure to check the Print Later box in the horizontal toolbar at the top of the screen.
When you’re finished, save the transaction. Since you want to pay the employee right away, click the Print Checks icon and click in the field in front of the correct check to select it, then click OK.
Easy, But Tricky
QuickBooks makes the mechanics of writing checks easy. Simple as it is, though, a lot can go wrong if you, for example:
- Issue a check from the wrong screen,
- Classify a check incorrectly, or,
- Skip a step.
We encourage you to set up a learning session with us if you’re new to check-writing in QuickBooks or are confused about any of its attributes. We’ll be happy to help ensure that your accounts payable activities will result in accurate record keeping.
Abandoned Property – What Is It? How Do We Account For It?
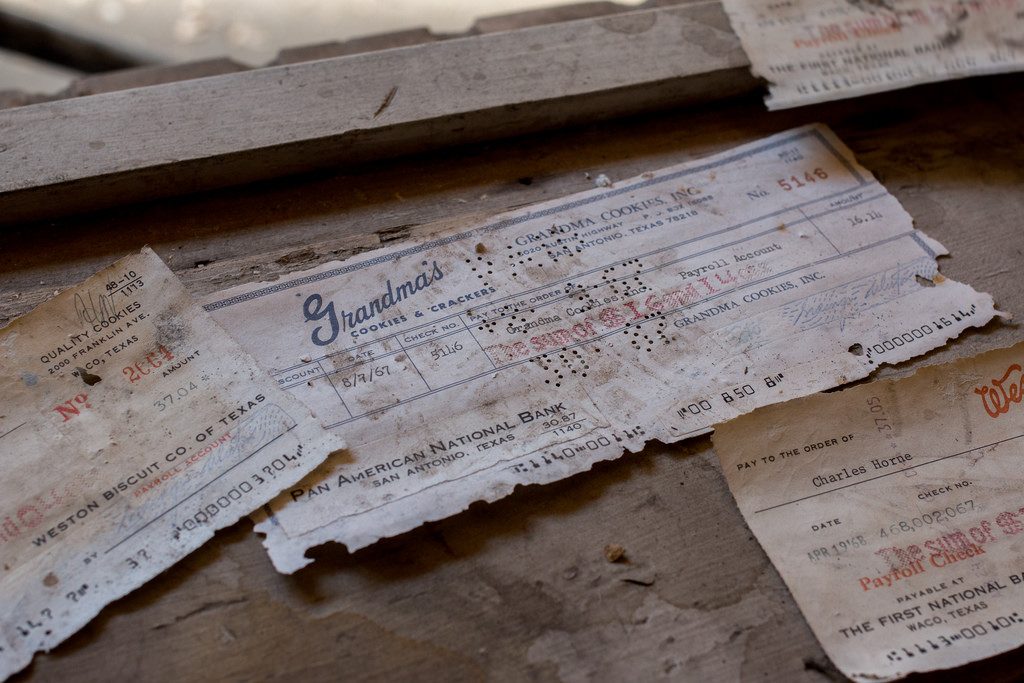
How many times have you written a check to someone, who either loses it or forgets to cash the check? After a certain amount of time, that check is considered stale and can no longer be presented to be cashed. It sits in your QuickBooks file uncleared on the bank statement reconciliation, now what?
You call the person, ask them to cash it. You may even re-issue the check so they have another chance to get paid, but then you find out they moved away and you don’t have their address, now what?
Uncashed checks to vendors, payroll checks to employees, contractors, dividends, and distributions to stockholders all are potential unclaimed or abandoned property. Every state has their own escheatment laws that require businesses and organizations to hand over to the state, the abandoned property that has been in their possession for a certain period of time. If a check goes uncashed, that does not mean the property no longer belongs to that individual and the obligation that the employer has to compensate the employee does not go away.
In the state of New Hampshire, you are required to notify the owner of the abandoned property. No more than 120 days prior to filing, all holders must send a written notice to the owner of the property having a value of $50.00 or more. In this notice you must verify the nature of the property and how to retrieve it and avoid abandonment to the state. If this attempt at notifying the owner is unsuccessful, you will then move forward to reporting the abandoned property to the state.
How to Report Abandoned Property in New Hampshire

To begin the process of reporting abandoned property, you must fill out the State of New Hampshire form for abandoned property which is Form T-1. Below is a link for your convenience to click on and review this form and/or print it.
https://www.nh.gov/treasury/documents/abandonded-propert-t1-form.pdf
For detailed instructions on how to fill out this form, we have also provided you the necessary link that will walk you through, step-by-step for filling out NH Form T-1.
https://www.nh.gov/treasury/documents/abandonded-property-t1-instructions.pdf
The first column on the form asks for the correct code for the property type. Here is a link that will show you which code is appropriate for your abandoned property.
https://www.nh.gov/treasury/documents/property-type-codes-t1-a.pdf
How to handle Abandoned Property in QuickBooks
It is important to remember that abandoned property does not belong to the company. That property is either owed to the state or owner. Uncashed checks should never be voided. Making sure your bank accounts are reconciled on a monthly basis will help you monitor uncashed checks. Once that property amount is sent to the state or given to the property owner, it can then be cleared from your bank reconciliation.
