 New Business Direction LLC
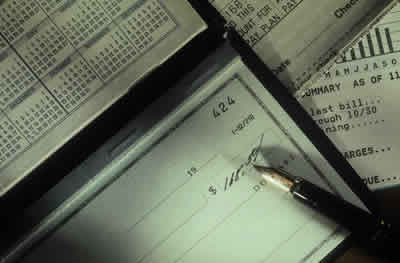 Please note that you should rarely need to void a payroll check. Remember that voiding a payroll check is not like voiding other kinds of checks; paychecks have associated tax and other liability calculations and payments that need to be taken into consideration. You are required to amend and file corrected payroll tax returns if you void a paycheck from a previous tax period.
To correctly replace a lost or destroyed paycheck and ensure that your payroll data remains accurate, you need to print a replacement check with a new check number and make a record of the lost or destroyed check.
Find the Paycheck in QuickBooks®
First, open the check register and find the paycheck that was lost or destroyed. In the Banking section on the Home page, click the Check Register icon. If you have more than one bank account, select the appropriate account and click the OK button. This brings up the Check Register where you can search for the lost or destroyed paycheck. You could also search for this check in the Employee Center.
Once you find the original paycheck, make a note of the check number and the net pay amount. You will need these later.
Double-click the entry in the register to open the Paycheck window. Select the To be printed checkbox and click the Print button at the top of the window to reprint the check using the next check number in your numbering sequence. Click Save & Close in the Paycheck window and close the check register.
This is the replacement paycheck that you will give the employee.
The next steps create a record of the lost or destroyed paycheck.
In the Banking section on the Home page, click the Write Checks icon.
-
- Use the same check number as the original lost or destroyed check.
- Make the date the same as the day the check was originally written.
- Make the check payable to the employee (ignore the message about using the built-in payroll features.)
- Make the check amount the net payment amount from the original check.
- Note in the memo line that this check was replaced by the check you reprinted.
- On the Expenses tab, choose Payroll Expenses in the Account column.
Click Save & Close.
Open the check register again. Find the check you just created, right-click it, and click Void Check.
You should now see the word “VOID” in the Memo field and a check amount of “0.00.” You now have a record in your check register of the lost or destroyed check.

*Please note that clients using the Assisted Payroll service and/or QuickBooks® Payroll with Direct Deposit may need to perform additional steps when reissuing paychecks to Employees.
This article of QuickBooks Tips and Tricks was based on the 2012 version of QuickBooks.
Non-sufficient funds (NSF) is a term used in the banking industry to indicate that a demand for payment (a check) cannot be honored because insufficient funds are available in the account on which the instrument was drawn. An NSF check is often referred to as a bad check or a bounced check.
When a customer’s check is returned for insufficient funds, perform the following steps in QuickBooks®
First, check to see if these items have already been set up in your QuickBooks file. Go to Lists, Item List and look for Other Charge Items called Bounced Check and Bounced Check Fee. If they are already on your Item List, you can skip step 1.
Step 1: Create items for tracking bounced checks and their associated charges: This is a one-time setup task.
- Go to the Lists menu and click Item List
- Click Items at the bottom of the list and then click New
- Under Type choose Other Charge and name it “Bounced Check”
- In the Amount or % field, leave a zero
- From the Tax Code list, choose Non (if you use Tax Codes)
- In the Account field, select your bank account (for example, Checking)
- Click Next.
- Create a second Other Charge item titled “Bounced Check Fee” for the service charge you assess your customers for bouncing checks
- In the Amount or % field, leave a zero
- From the Tax Code list, choose Non (if you use Tax Codes)
- In the Account field, choose Bank Service Charges
- Click OK
Step 2: Use the items you created in Step One to re-invoice the customer for the bounced check, plus any bank fees you want to recover.
- Click Customer Center
- On the Customers & Jobs tab, select the customer with the bounced check
- Right-click and choose Create Invoices
- For the first line item on the invoice, use the Bounced Check item for the amount of the bad check
*Note: Because this item is linked to your bank account, this will reduce your bank account by the amount of the bounced check.
- For the second line item on the invoice, use the Bounced Check Fee item for the amount of any bank fees that you want to recover from the customer
- Complete filling out the invoice as usual
Step 3: QuickBooks® has a Bounced Check Letter that you can send along with the new invoice
- Select the customer in the Customer Center
- Go to the Word menu at the top of the Customer Center and click Prepare Letter to Customer
- Follow the onscreen instructions in the Letters and Envelopes wizard
- In the Choose a Letter Template window, choose Bounced Check
Step 4: Enter your bank’s bounced check charge when you reconcile your bank statement
When you reconcile your bank statement:
- Include your bank’s charge for the bounced check in the Service Charge field
- In the Service Charge Account field, enter Bank Service Charges
This article of QuickBooks Tips and Tricks was based on the 2012 version of QuickBooks.
Each January we rush around to gather tax information on the independent contractors we paid in the prior year in order to send them a 1099. Here are some basic tips for making it easier and less hurried for next year.
Form W-9
As a trade or business, you are required to obtain a Form W-9 from your independent contractors before you pay them, better yet – before they do any work for you. This is regardless of how much money you pay them. This form will give you the name, business name, address, entity type and taxpayer identification number.
Who Needs a 1099?
Service Providers – Anyone you pay in the course of your trade or business for services rendered. This includes Accountants, Consultants, Architects, Engineers, Designers, Contractors, Plumbers, Electricians, Installers, Landscapers, Snow Removal companies, Cleaning companies, the Auto Repair technician, Entertainers – anyone who performs a service or casual labor for your business who is not your employee.
Rents – If your business pays rent for office space or land or equipment, you are required to send the recipient a 1099 for the amount of rent you have paid them.Exclusions – Sole proprietorships, partnerships and LLC’s that are taxed as sole proprietors and/or partnerships receive a 1099. You are not required to send 1099’s to a Corporation or a Tax Exempt entity. The Form W-9 will provide information regarding the entity type.
Threshold – Send to recipients to whom you have paid $600 or more during the calendar year.
Deadline
January 31st of the following year to recipients. February 28th to the Internal Revenue Service.
This article of QuickBooks Tips and Tricks was based on the 2012 version of QuickBooks.
